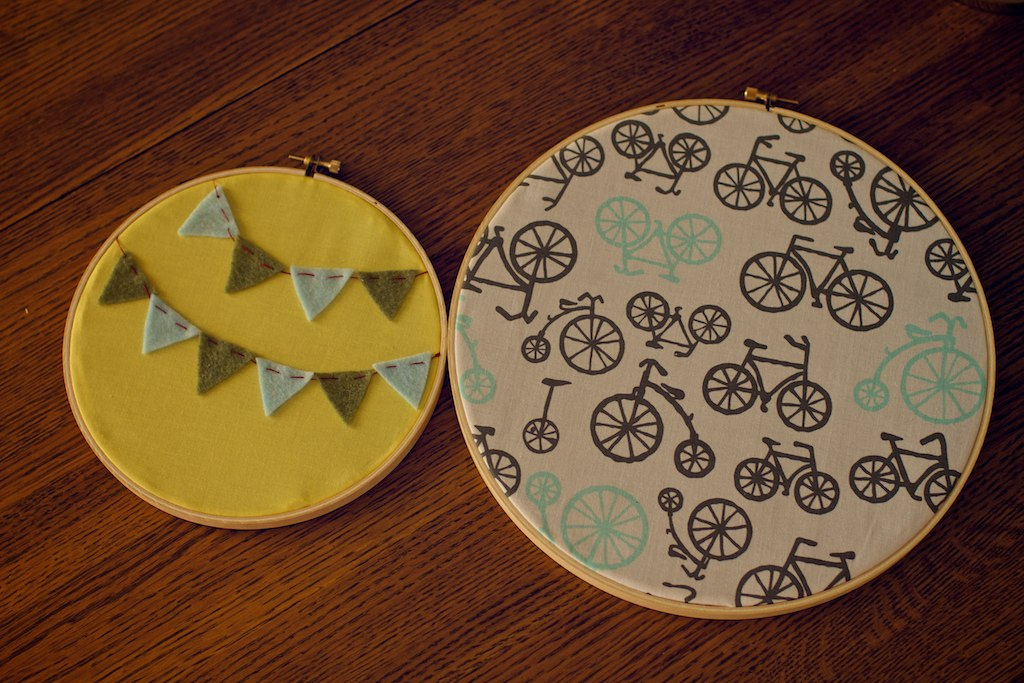
Besides the terrarium, another gift I made for Todd, Carrie, & their new baby boy was a few nursery decorations! It’s simple, yet makes a big statement – fabric covered embroidery hoops! I had some adorable bike fabric that I knew would be perfect and then I made another hoop with yellow fabric, but it needed more. So I made bunting out of felt and hand stitched it together. They turned out super cute! I have a lot more hoops and fabric to make some for myself.
They’re really easy and you’ve probably seen them all over Pinterest! But just incase you haven’t…
Here’s what you need:
- Fabric
- Any size embroidery hoop(s)
- An iron
- Glue (I used ModPodge)
- Scissors
- Anything else that you may want to add (felt, paint, etc!)
Here’s the steps (this is not my original idea so I don’t take the credit!):
- Cut your fabric into a square so it will cover the whole circle.
- Iron your fabric!
- Place the fabric inside your hoop and pull it tight.
- Once you get it how you like it, glue your excess fabric to the back of the hoop. I had to cut some off first, which you may or may not have to do. I didn’t want it to show through if the fabric was too thin.
- Optional : Paint your hoop, add any embellishments, embroidery, hand-stiching, painting – the sky is the limit!
What a great gift for someone or even yourself! Here’s some of my favorites that I’ve pinned.

Source: purlbee.com via Mindy on Pinterest


Leave a Reply